Self-Directed and Continuous Learning
I realized after picking this study that a designer can't just rely on knowledge gained during your school time. To be a designer is to be eager to learn new things, as technology and society both change constantly. I think that's what Self-Directed and Continuous Learning is stimulating. Keeping your knowledge-base up-to-date and figuring problems with your own initiative. Before my study at TU/e that was not such an important thing, and it took quite some getting used to. That didn't mean I couldn't do it, I just never did it with such intensity.
I do think I've found my way in Self-Directed Learning. I now see certain patterns in what I do and in what I learned. I also see how I can improve on these activities, or on this knowledge. For some of this knowledge I also know how to apply it. It really helps that I keep reflecting and documenting. While making these reflections on the competencies, I found out that I gained more knowledge of certain fields than I originally thought. This showed me some opportunities of how to improve what I learned, or where to apply it.
Ideas and Concepts
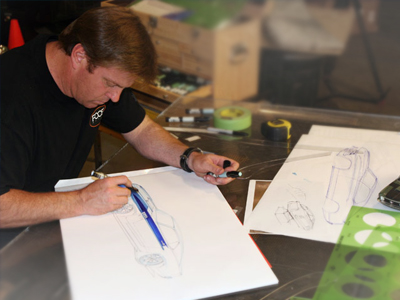
This competency is about idea generation and about the presentation of your ideas. On this competency I started quite blank. I did come up with ideas occasionally, but not with certain techniques or with a target. Most of the ideas generated were just spontaneous. At the start of the semester, I learned a bit about idea generation by means of brainstorming.
In the project work we brainstormed and mindmapped a lot. However, working solo during personal research/ideation, I found it hard to come up with some new ideas other than the spontaneous ideas. That's why I chose to do 'Look!', which thought me some more about the ideation as a path to good ideas. I learned how to find inspiration, or translate a design assignment to abstract expressions, making it easier to come up with new ideas. During this assignment I took pictures, made sketches and made mood boards.
This competency has a relation with Form and Senses, as I found myself doodling and drawing during ideation. But I also gained a lot of inspiration during the assignment 'Look!' by exploring the shape and materials for the design.
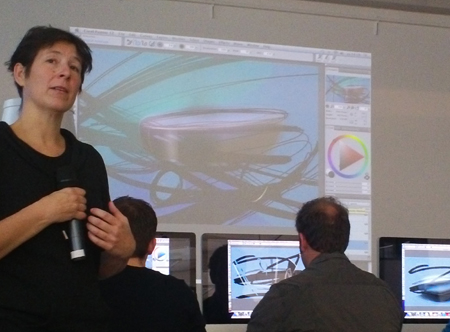
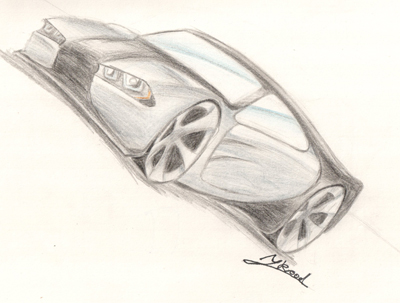
At my project 'Adaptive and Informative Skin', we iterated the ideation process a couple of times.

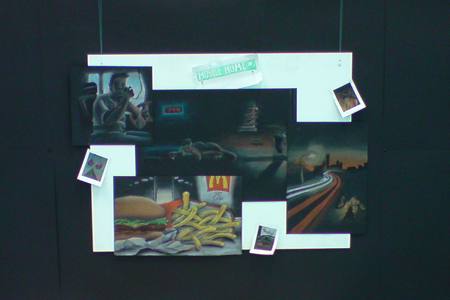
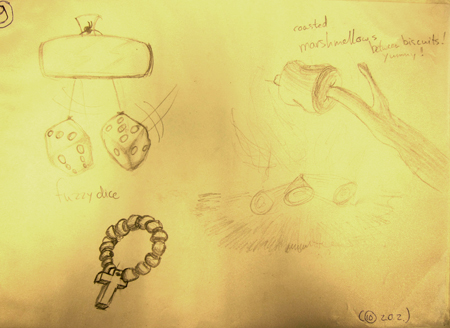
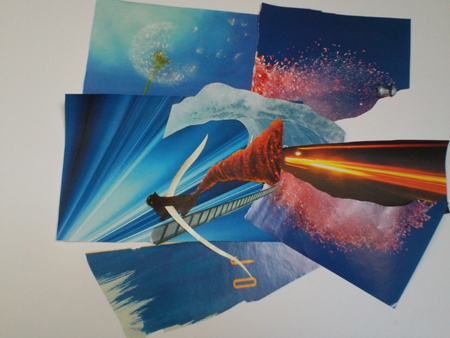
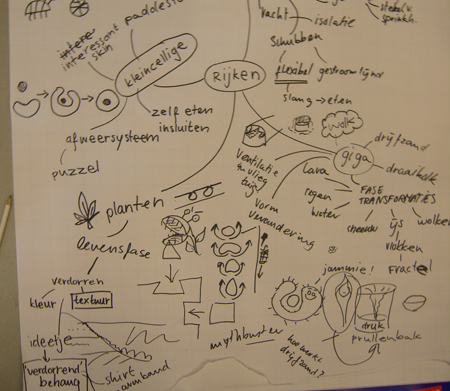
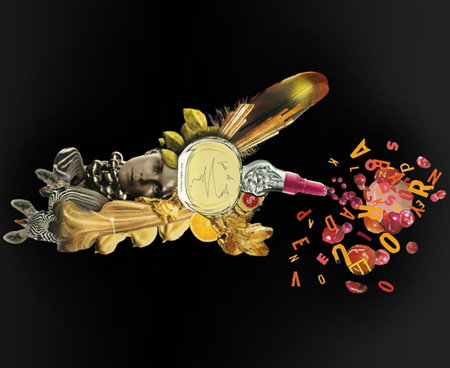
A mood board made during the assignment 'Look!', as another means for finding inspiration.
Form and Senses
Before this study, I was already quite aware of this competency. I had Art class in secondary school which contributed quite much in the feeling for drawing. However, there still is much to learn in this competency. During my project Adaptive and Informative Skin in B1.1 I did some modelling with my team members, but not very extensive.
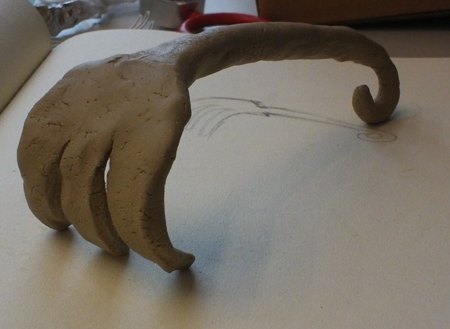
That's why I chose to do the assignment 'Look!', to get some more experience in this competency among others. All the prototyping I did there contributed quite much to my feeling for form-giving and for different materials. Also to the view on the quality of the models one makes. I do think that I improved the overall quality of the deliverables, as I strived for a more polished and smooth design every iteration.
I think this competency has some connections with Ideas and Concept, because I learned at the assignment 'Look!' that inspiration for the ideation is also found in exploring the shape and the material of the design even when you're still in the ideation phase.
My view on this competency changed during this semester, and I also gained some practical experience in form-giving. Next semester I would like to put this more to practice. This semester's project the prototypes were mostly focused on the material rather than the feeling or impression a design gives you.
The feedback I got from my coach was quite positive: I had quite some experience in Form and Senses already, but still I manage to develop this competency quite well. I can design nicely styled products, but I still need to develop my own style. Most design by me are still themed within a certain subject, which isn't quite my own.
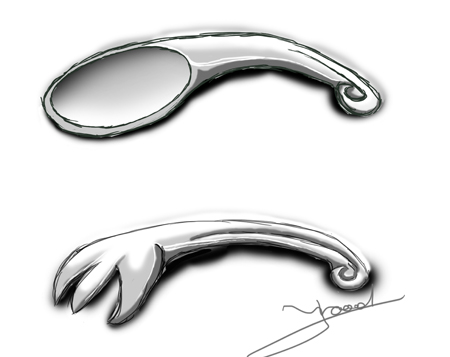
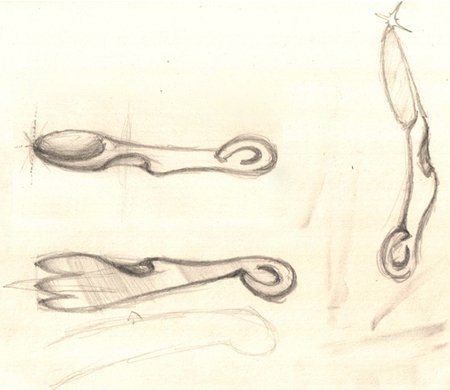
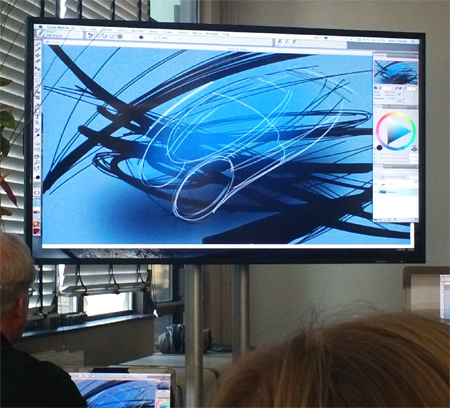
I iterated a lot with sketches in order to find the right shape.
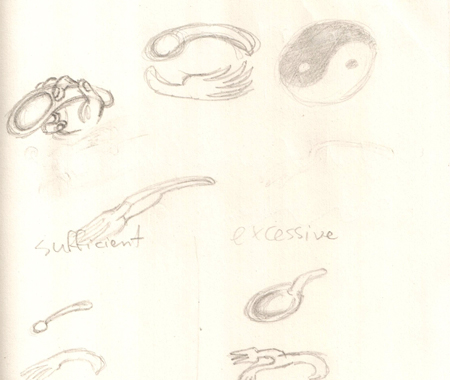
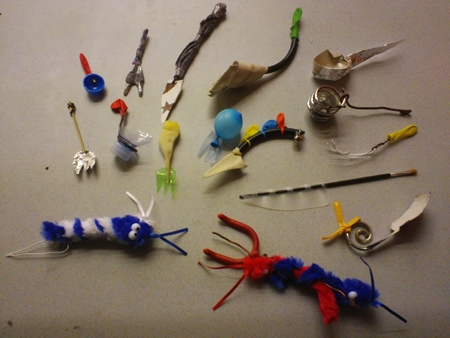
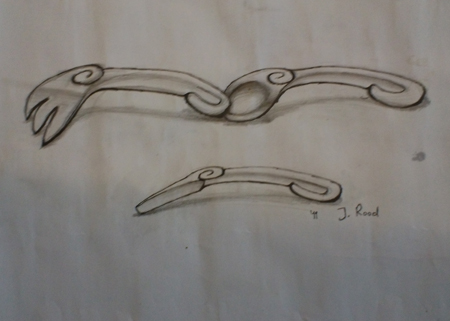
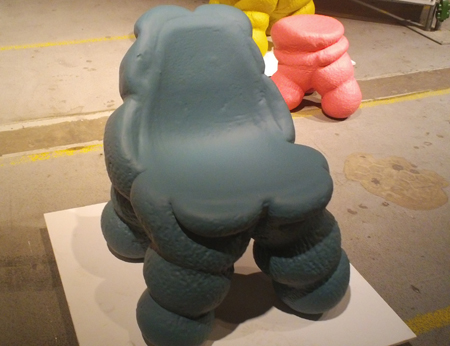
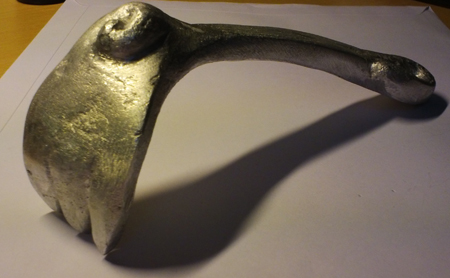
A concept model of cutlery, made for the assignment 'Look!'.
Integrating Technology
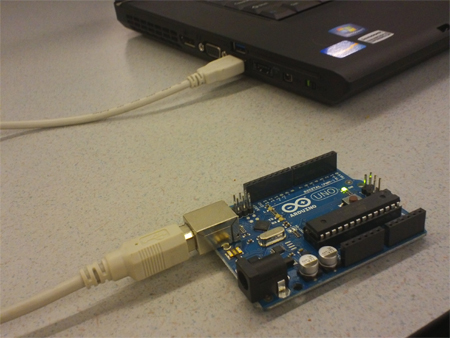
This competency is about the technological feasibility of a design. It's more than connecting components, and that's what I learned during this semester. Several times during the project I thought about how to realize a product. I also did an arduino workshop to find our more about how to work with an arduino. This made me see that Integrating Technology is also research for existing technologies.
All in all I changed in view to this competency. At first I indeed thought it was about fiddling with wires and lights, but that view changed during this semester. The project I worked on in B1.1 as well as the idea we took during the project didn't contribute much more to Integrating Technology than speculating and doing research. That's why I would like to do some more with actual prototyping in the next project.
Feedback I got from my coach is that I gained some awareness in this competency, but there's still much to explore in order to gain more awareness for this competency. I mostly did theoretical research, as well as expert research. But actual applying of any technology was not covered. That means there still are topics to explore when it comes to actually putting any technology to practice.
Topics like Sensors and Actuators -building interfaces which lead to actual action-, Transformations and Intelligent Control -how the product is going to actually work-, Physics for ID -taking the laws of physics into account-, Material Properties and Manufacturing Technology -taking into account the manufacturing as well as material aspects- and Technology Integration and System Level engineering -designing the actual lay out of the system inside the device-.
User Focus and Perspective
During the first quartile I attended expert meetings for this competency, for DG000. What I learned from these meetings, is that User Focus and Perspective is about the interaction with the user, but interaction design is not the only topic focused on. The product also needs to give the user an intuitive experience, it has to be fun. It's about understanding the user in terms of what a user is able to do, what the user isn't capable of, and what makes the user use the product. But it's also about how to fetch this information, think about questionnaires, user tests and first reactions after teasers/promotion videos.
I may have had some experience with UFP in making websites, but then I would have thought it was all about user-friendliness. That's why this competency was, for me, first connected to that view. But now I know there's more. It's not just speculating what would be easy or fun to use, but also letting users experience some interaction with the design, while you observe their interaction and try to optimize that.
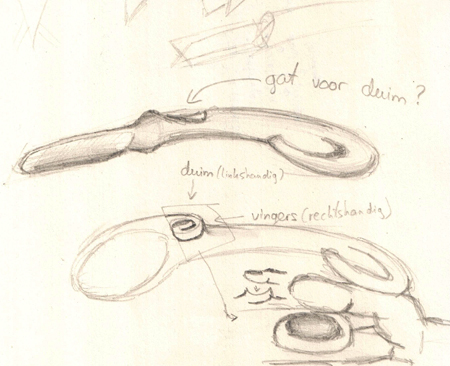
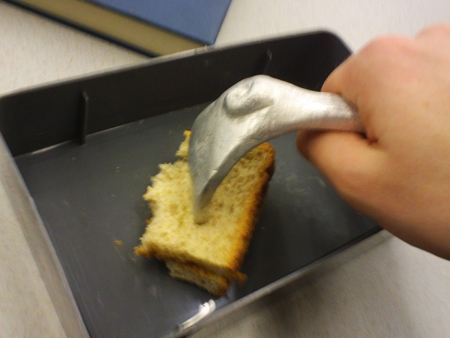
During the assignment 'Look!' we had to keep the interaction of the user with the piece of cutlery we were making in mind. During the meetings we discussed the ways of interacting, and how it can be improved in order to better suit the type of interaction needed. The interaction of my piece of cutlery had to be really excessive, so I made the piece of cutlery in such a way that the user needs to eat more like a caveman. With elbows up, head close to the food.
I would like to apply knowledge I gained during this semester more in the next semester. Also reading the book "Interaction Design: beyond human-computer interaction" would be a good thing to do.
As the assignment 'Look!', we had to keep the way of interacting in mind, and as a consequence the interaction was tested in the end.
Socio-cultural Awareness
This competency is about keeping track of socio-cultural differences in different areas in the world as well as following trends and ethics in the world. Before my start at Industrial Design I wasn't aware of this competency at all. I didn't know what it was about when I first heard of it.
I now know that a design could be accepted in one region, but because of a different culture somewhere else the product could be interpreted wrongly or be even rejected. I attended expert meetings for this competency, but I didn't develop it well enough to my opinion.
That's because I had a hard time communicating with the expert, and the competency was hardly applicable to my project. I tried to do some research on cultural differences when it comes to controlling nature, as that might have been at least applicable to our theme. There I found some differences in attitude as well as differences in ways of thinking of people in different regions.
But that's not just it. One needs to be able to follow trends, and design accordingly. A product and it's production-process must also be sustainable. It must be of a certain quality, as well as socially sound. If it's made with child labour it not socially justified, and that hurts the ethics of the product. In addition there is art history. Replicating a certain style is not enough. One needs to be critical about the impact of this style, and what regions might like it.
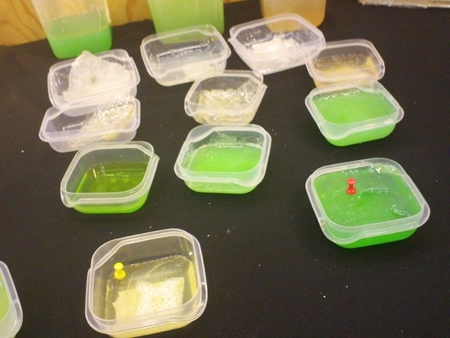
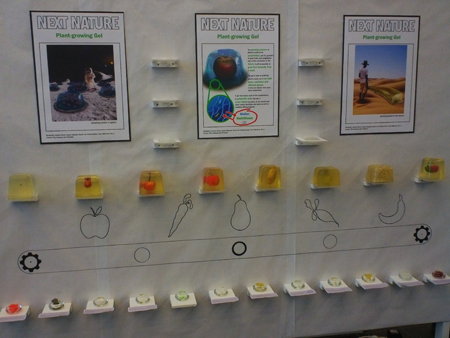
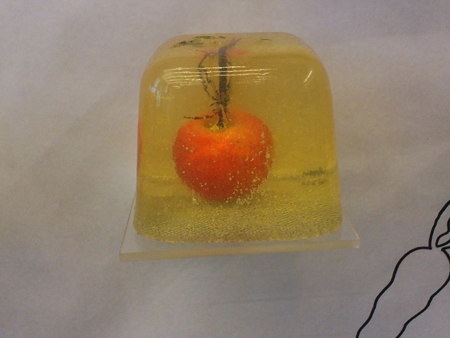
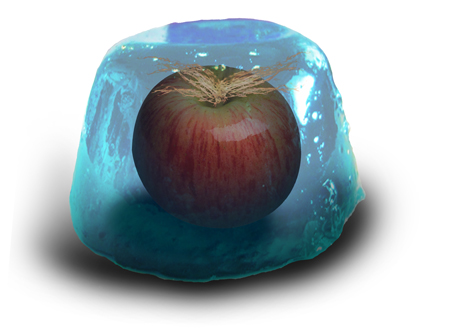
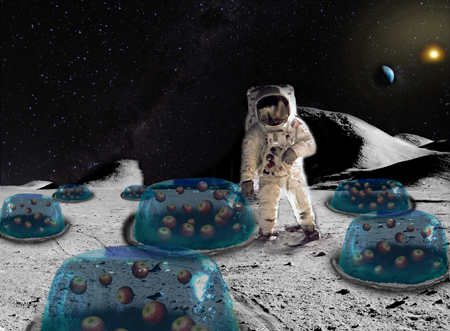
Furthermore, the feedback we got during the Interim Exhibition about the gel concept was closest to the results of a user research. We asked whether people would or wouldn't like the idea of storing objects inside a gel, and picking them out again. Some reactions were "Cool! I think that would be awesome, but I won't leave my phone in there.." or "Eww.. Sounds really disgusting!".
When I chose Socio-cultural Awareness along with User Focus and Perspective to attend during DG000, I didn't realize that those two have a lot in common. These two are both user-focused. That means for both of them user testing or user researching is used to gain some more awareness about the target group. Socio-cultural Awareness is more about the ethical as well as societal aspect, whereas User Focus and Perspective is more about the user interaction itself.
Up next might be reading the book "Allemaal Anderdenkenden" from Gert Jan Hofstede.
Teamwork and Communication
Working in a team or getting experts involved is essential in a design process. That's what Teamwork and Communication is about. During the first semester of my study I had more and intenser teamwork than I ever had before in my school time.
I found out that teamwork is about communicating with eachother. We split up the work among the team members, and we also made a synchronization folder on the internet that kept everyone up-to-date on eachother's progress. Within the team there were a lot of discussions. Thanks to the workshop 'Meeting Skills', these discussions were more to-the-point, and hardly ever turned into fights. The attitude of everyone was far more professional. And we learned to deal with eachother.
Furthermore, I did a presentation about our project before the Final Exhibition in front of all the students of the theme Next Nature. It was a good experience to test and train my presentation skills. After the presentation I got some feedback from my coach as well as from other students. I learned from that, too. I should present more loudly, as well as improve my intonation so the whole presentation is more vivid.
When I started this semester I noticed I still was a bit shy. That changed, and I became a bit more cheeky. I also became more pro-active, and developed myself in communicating with my team members.
Descriptive and Mathematical Modeling
This competency is about making models, overviews and predictions, for example for keeping an eye on errors, as well as production optimalisation. With descriptive and mathematical modelling you can make models that support the decision-making in any step of the process, gaining a clear view of what's going on.
In addition you can use this competency for quality control or user tests, as making a model can give you a clear view of the quality or the outcome of user tests as well (as long as a representative group was surveyed). But I think it's also involved in the strategy Thinking: Analysing, Abstracting. This way, I think during the start of our project we were involved with this competency. We tried to define a model of 'Adaptive and Informative Skin'. However limited, I still think I developed it a little this way.
I understand what this competency is about, and I think I know how to work with it. But I didn't develop this competency that much, as I didn't do any specific activity that covered this competency. I might have gained a little knowledge on this competency implicitly, though.
Design and Research Processes
As a designer, you need to know what you need to do when in a design process. That doesn't mean there's a strict model for designing, but you need to know how to adapt your process plan to any situation. For my project, I approached it via the 1-10-100-method. This means you iterate the design process multiple times, optimizing your design or vision, or trying different approaches for coming to a final design.
During the assignment 'Look!' I learned to take different approaches in a design process. I sketched, made mood boards, made scrap models and explored materials such as clay and aluminum.
For such decision-making, there has to be done research regularly. I learned that research can be done at any time, but is not always necessary. What I realized is that at the beginning of our project there has been done a lot of contextual research for the assignment of the project.
That doesn't mean this competency is only about doing research. As mentioned above, the research is also leading to a view on how to go through a design process in a suitable way at a certain situation. In addition, I found out that the design process is also a jigsaw puzzle, where the right pieces are already supplied by this competency's knowledge, but it's up to you how to lay them out. What I realized was that Designing Business Processes is also part of the pieces, which could be interchanged randomly with many of the other pieces.
The approach taken in the assignment 'Look!' wasn't quite applicable to my project, but if I could go back in time and do the project over, I would definitely take a different approach for the project. Although, the approach taken wasn't that bad, as it quite suited our theme. But I definitely would do some more research to gain a better insight on the context, and to not lose track of it.
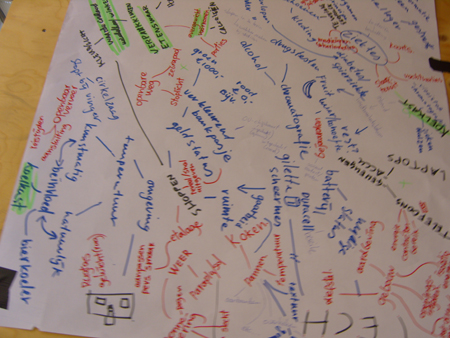
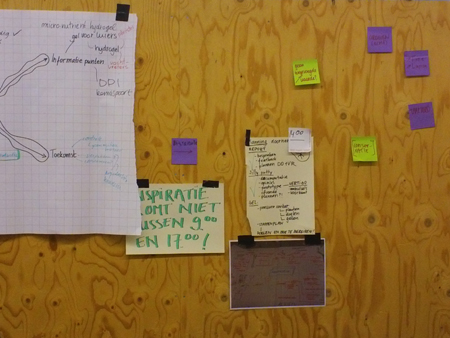
Some research results, as well as task division were stuck to the wall, to create an overview of everything.
Designing Business Processes
This competency is about getting the product into the real world. It's about optimalisation of the design in order to fit it in mass-production. Furthermore, it's also about delivering quality and being flexible as a company when it comes to societal changes and changes done by competitors. This way, I think it is related to Descriptive and Mathematical Modelling, as they both aim at creating overviews, but the difference is that for Designing Business Processes one needs to make decisions, which is not necessary for Descriptive and Mathematical Modelling.
Before this study, I didn't even relate this to the design process. And when I first heard of it, I didn't know what it was about. I thought because of 'business' in the name it would mainly focus on economy models. How wrong was I. It's also about being the first to come up with an innovative product or service. Moreover, it's also about keeping up with the competitor when the time is right.
In addition, it's not all about making profit or having a monopoly with your service or product. It's also about making the difference, about serving and involving society.
I didn't develop this competency that much, as I just attended a presentation about it. I hope to focus some more on this competency in the next semester.
Overall Growth
During the first semester I found out about the overall competence of designing. I learned about each competency and the drives and strategies that connects all of them. I found out that some competencies applied more to certain steps in the design process than others. I found some connections between the drives and strategies and the competencies.
As the drive Envisioning Transforming Society is among other things about gaining some more awareness on the context as well as about envisioning a revolutionary solution, it fits for Ideas and Concepts. But since the research to the context also implies to societal and cultural differences, it is also applicable to Socio-cultural Awareness.
Exploring and Validating in Context is more about gaining information about how the design would interact with the user, if at all. It's about testing the design in society. User Focus and Perspective comes to play here. But as there is also thought about how it will work in society, I think Designing Business Processes is also connected with this drive.
The strategy Making: synthesising, concretising is about coming up with actual ideas, descriptive models of the context, or experimental prototypes. You concretise the design problem and start making a solution for this problem. Form and Senses, Design and Research Processes and Ideas and Concepts are applicable here.
Thinking: analysing, abstracting is about the thinking and problem-solving involved inside the design process. Here one either sticks to an existing model (of for example the way of interacting, or of the problem itself) or tries to redefine this model. But another aim of this strategy is to find actual solutions. Here User Focus and Perspective, Integrating Technology, Form and Senses and Descriptive and Mathematical Modelling are involved.
Concerning these drives and strategies, Envisioning Transforming Society played a big part inside my project 'Adaptive and Informative Skin'. Making: Synthesising, Concretising also came to play in my project. This also applies to the assignment 'Look!' I attended. So was Thinking: Analysing, Abstracting. Exploring and Validating in Context was less represented in my project, with the project's aim on finding really futuristic and perhaps controversial solutions. We were most of the time preoccupied with the feasibility and the actual shape of our design. With the assignment 'Look!' on the other hand, we had to think about the way of interacting. In the end we had to test our designs on the way of interaction.